.NET MAUI 자습서 - C#으로 첫 번째 멀티 플랫폼 앱 빌드
다운로드 및 설치
-
.NET SDK 다운로드 및 설치. 다운로드가 완료되면 다운로드를 실행하여 설치를 시작합니다.
.NET 10 SDK x64(Intel) 다운로드
.NET 10 SDK Arm64(Apple Silicon) 다운로드Apple M1 또는 M2 칩이 있는 Mac을 사용하는 경우 Arm64 버전의 SDK를 설치해야 합니다.
-
VS Code 다운로드 및 설치:
-
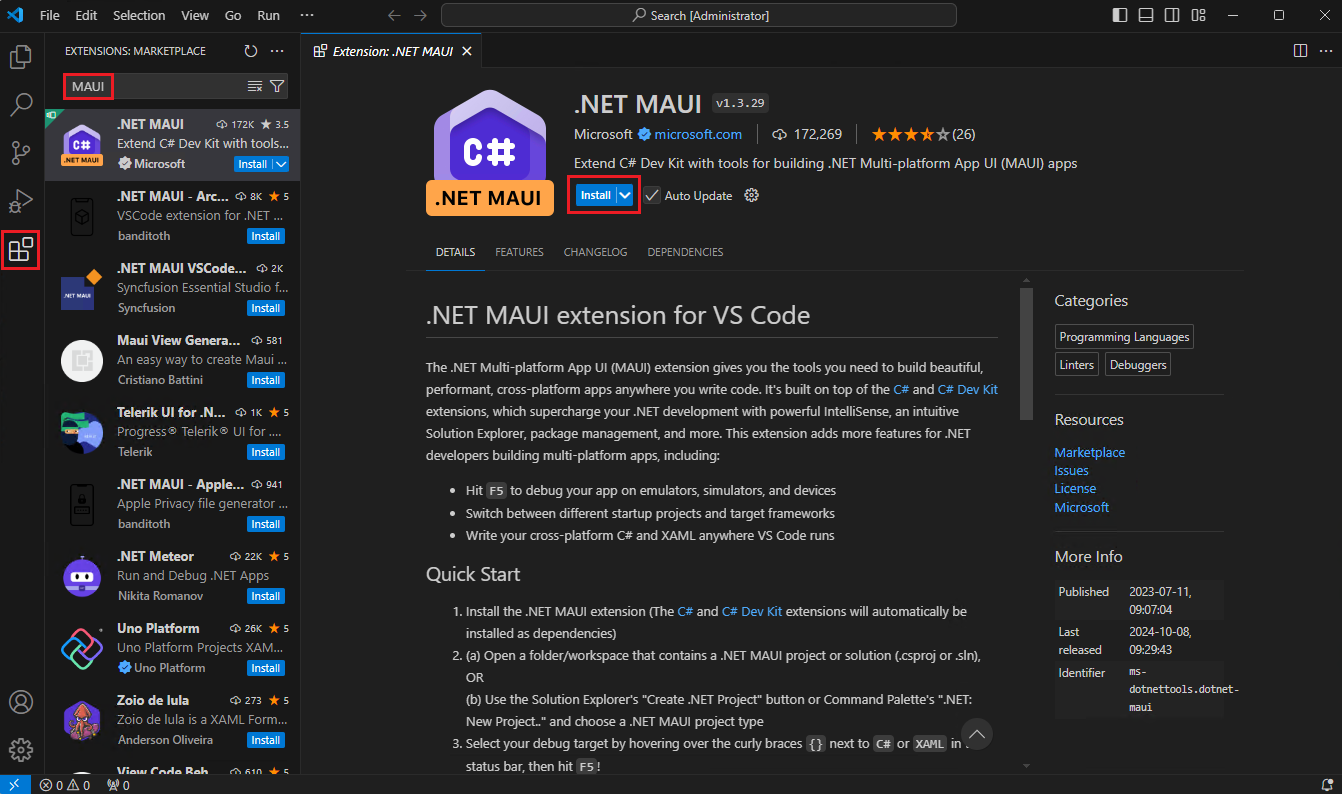
VS Code를 열고 왼쪽의 VS Code 작업 표시줄에서 확장 버튼을 선택합니다. 검색 창에 MAUI를 입력하고 .NET MAUI를 선택한 다음 .NET MAUI 확장 페이지에서 설치 버튼을 선택합니다.
![VS Code MAUI 확장]()
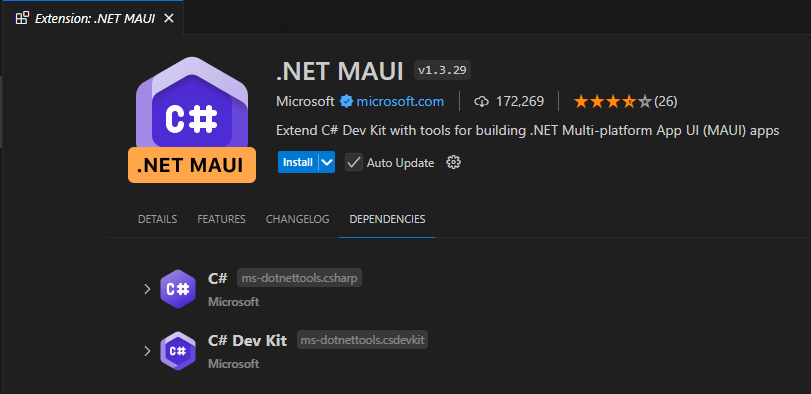
이 확장에는 .NET MAUI 확장을 실행하는 데 필요한 C# 개발자 키트와 C# 확장이 함께 제공됩니다.
![VS Code의 MAUI 확장 종속성]()
-
새 터미널을 열고 다음 명령을 실행하여 .NET MAUI 워크로드를 설치합니다.
Terminalsudo dotnet workload install maui설치에 성공하면 다음과 유사한 출력이 표시됩니다.
TerminalSuccessfully installed workload maui
올바르게 설치된 모든 것을 확인하세요
환경을 설정했으면 새 VS Code 터미널을 엽니다. 도구 모음에서 터미널을 선택한 다음 새 터미널을 선택합니다.
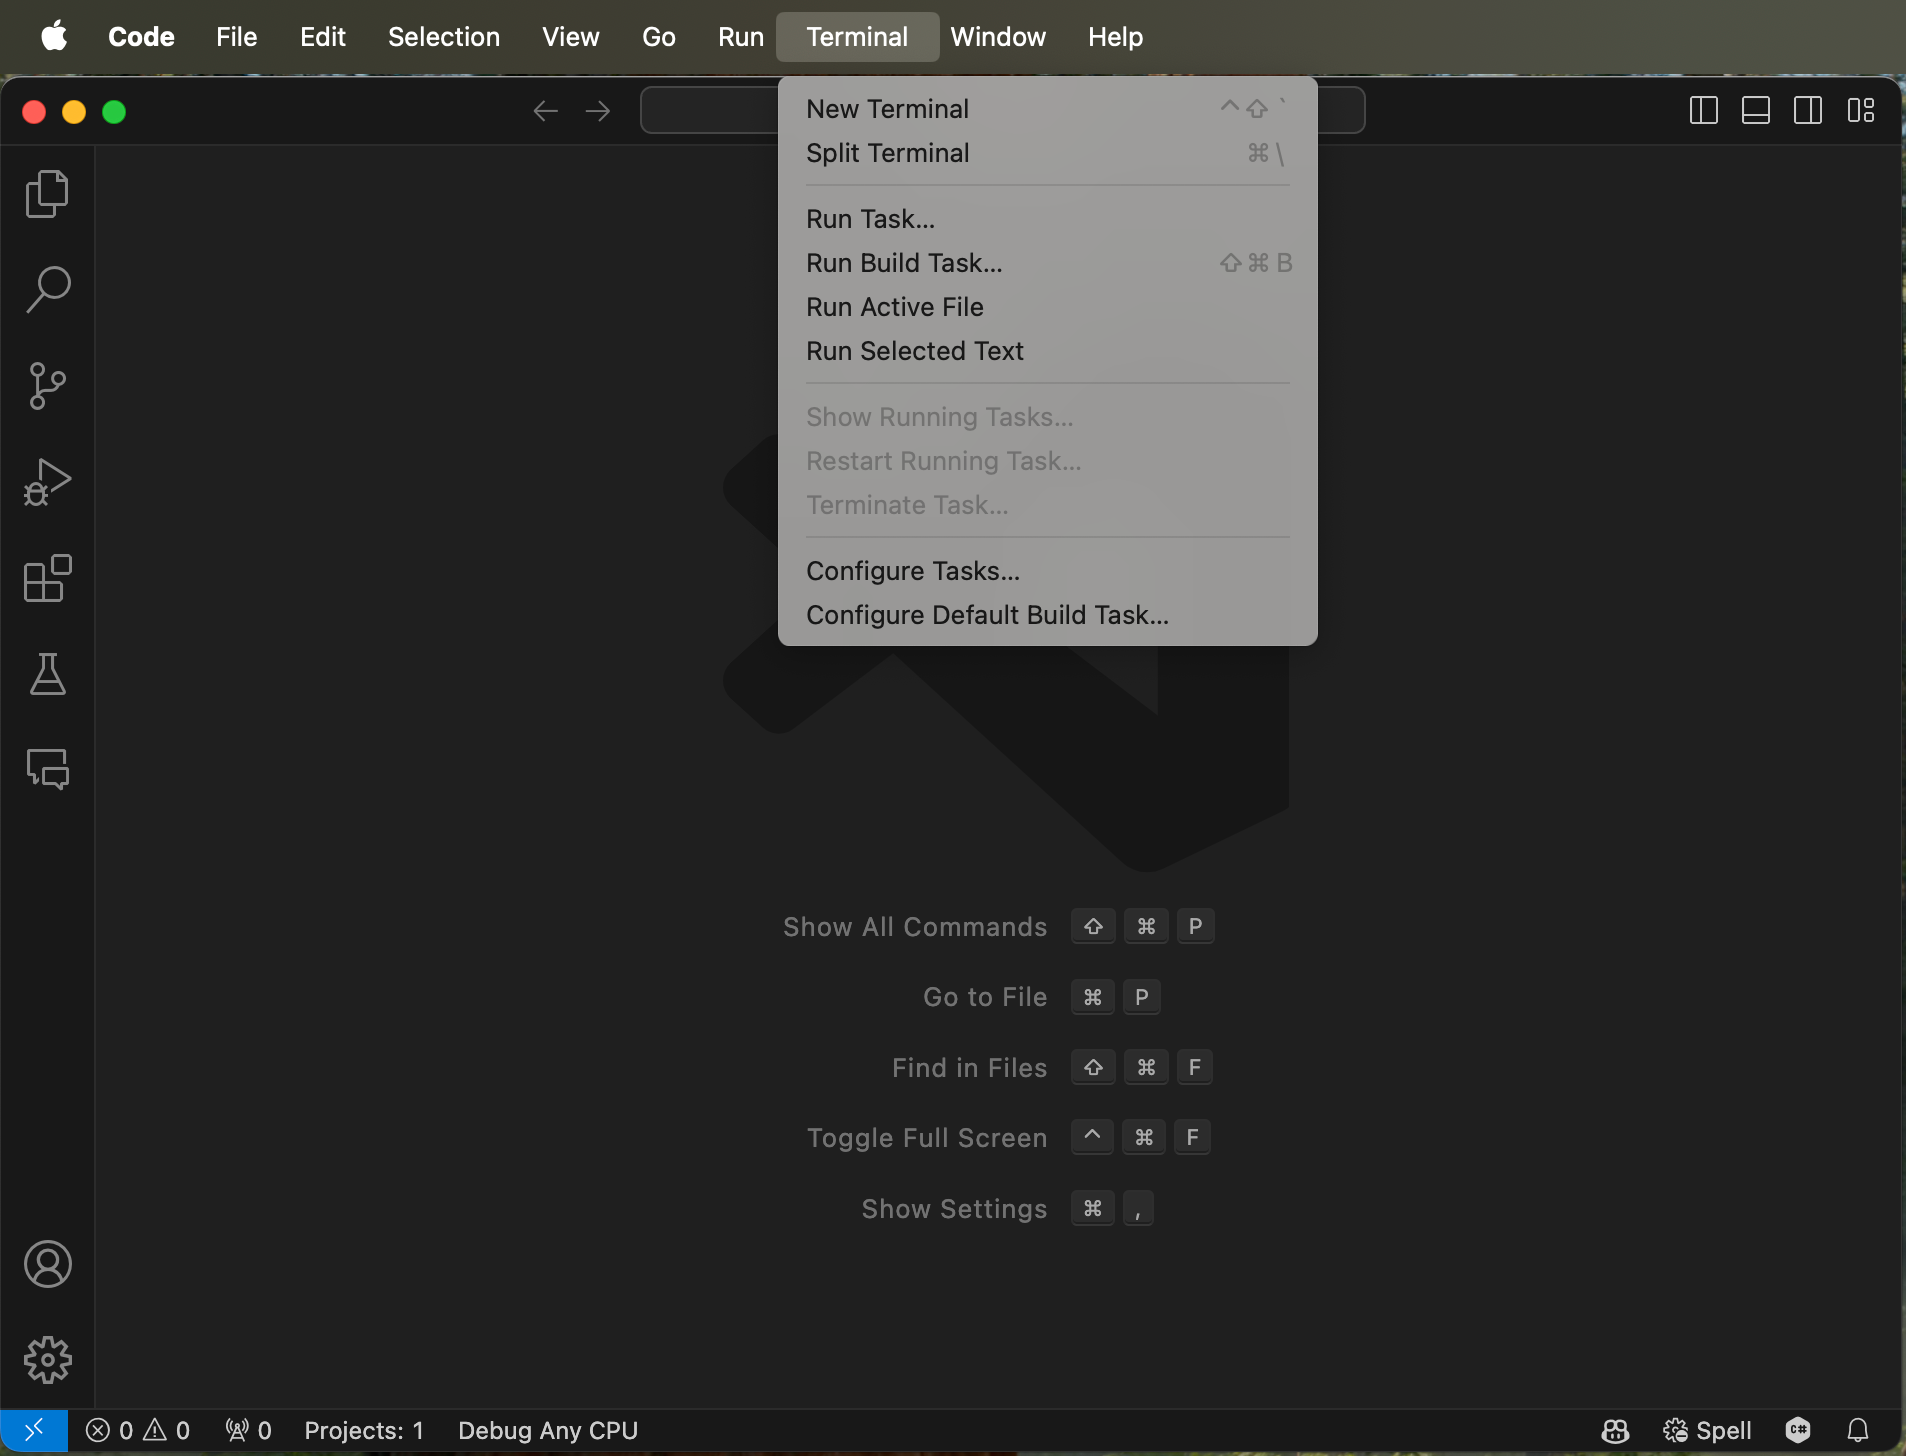
터미널에서 다음 명령을 실행하여 설치를 확인합니다.
dotnet workload list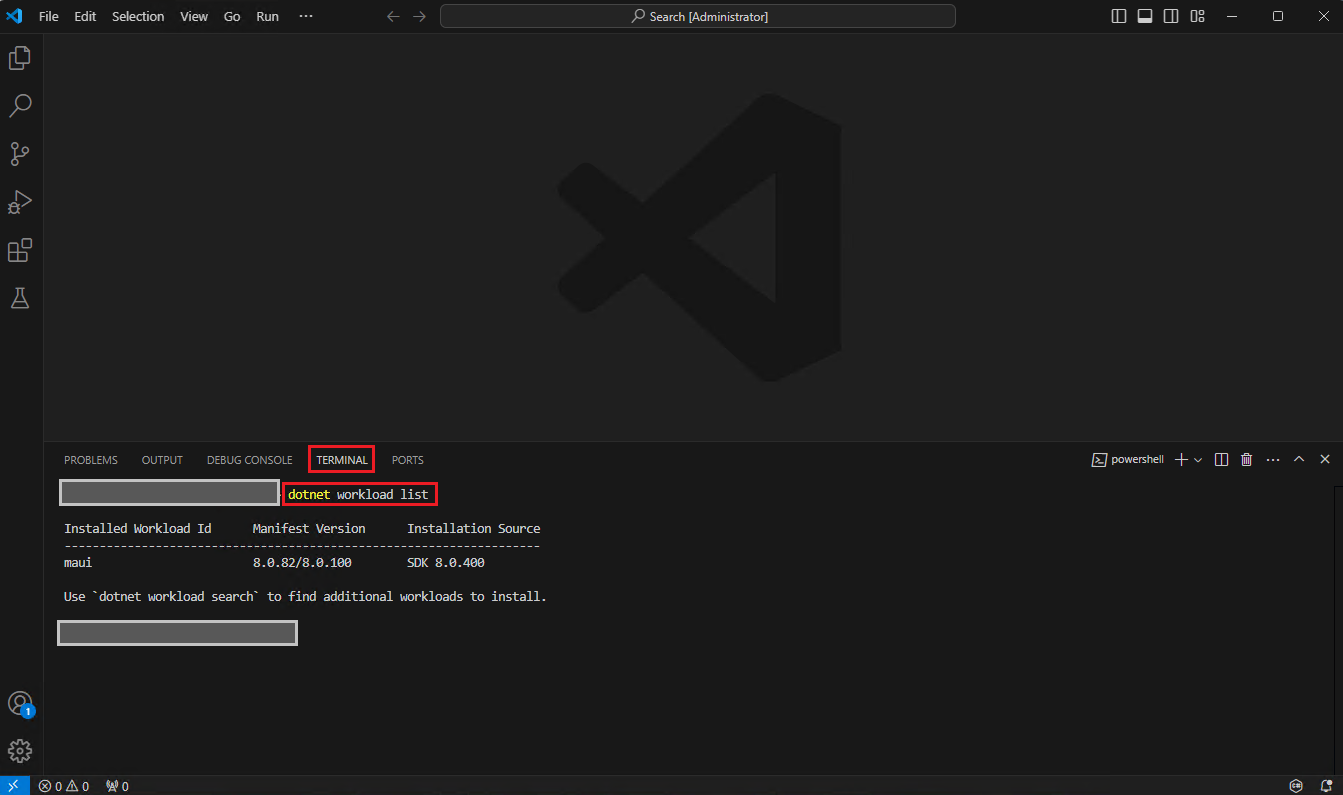
설치에 성공하면 다음과 유사한 출력이 표시됩니다.
Installed Workload Id      Manifest Version      Installation Source
--------------------------------------------------------------------
maui                       8.0.82/8.0.100        SDK 8.0.400

Use `dotnet workload search` to find additional workloads to install.
오류가 있나요?
'dotnet'이 내부 또는 외부 명령 오류로 인식되지 않음 오류가 발생하는 경우 새 VS Code 터미널을 열었는지 확인합니다. VS Code를 다시 시작하거나컴퓨터를 다시 시작해도 문제를 해결할 수 없는 경우 페이지 맨 아래의 문제가 발생했습니다 버튼을 사용하여 문제 해결에 도움을 받으세요.
Xcode 설치
.NET MAUI 앱을 빌드하려면 다음도 필요합니다.
-
.NET MAUI와 호환되는 최신 버전의 Xcode를 찾으려면 이 릴리스 버전 참조를 확인하세요. Apple 도구 열로 이동하여 호환되는 최신 Xcode 버전을 찾습니다.
-
Apple ID
Apple ID가 아직 없는 경우 https://appleid.apple.com에서 새 ID를 만들 수 있습니다. Xcode를 설치하고 로그인하려면 Apple ID가 필요합니다.
Xcode를 설치한 후 Xcode를 열고 라이선스 계약에 동의한 다음, 메시지가 표시되면 선택적 구성 요소를 설치해야 합니다.
-
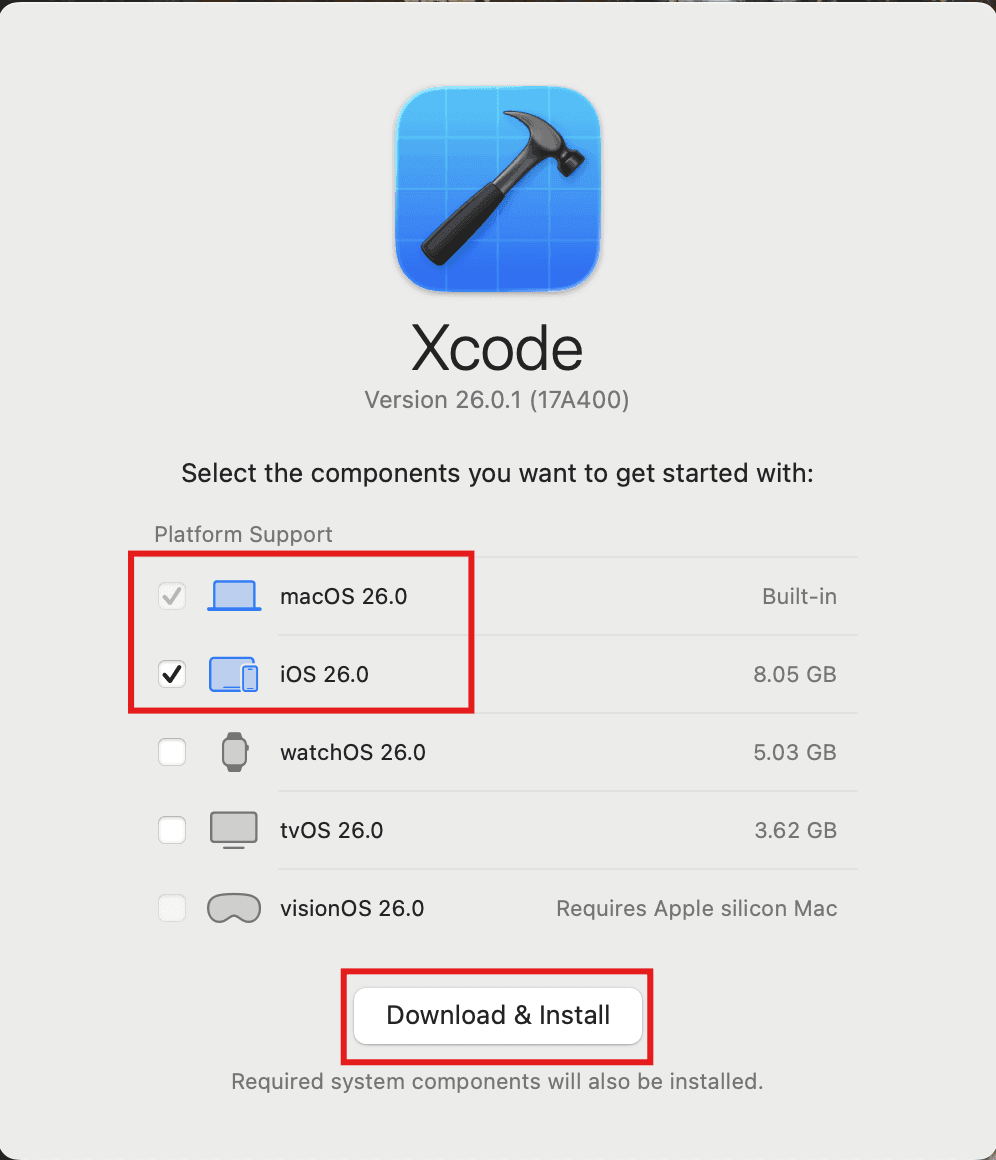
개발하려는 플랫폼을 묻는 질문에 macOS 및 iOS 플랫폼을 선택한 다음 다운로드 및 설치를 선택합니다.
![macOS와 iOS 플랫폼을 설치하라는 Xcode의 프롬프트]()
-
새 터미널을 열고 다음 명령을 실행하여 Xcode 명령줄 개발자 도구를 설치합니다.
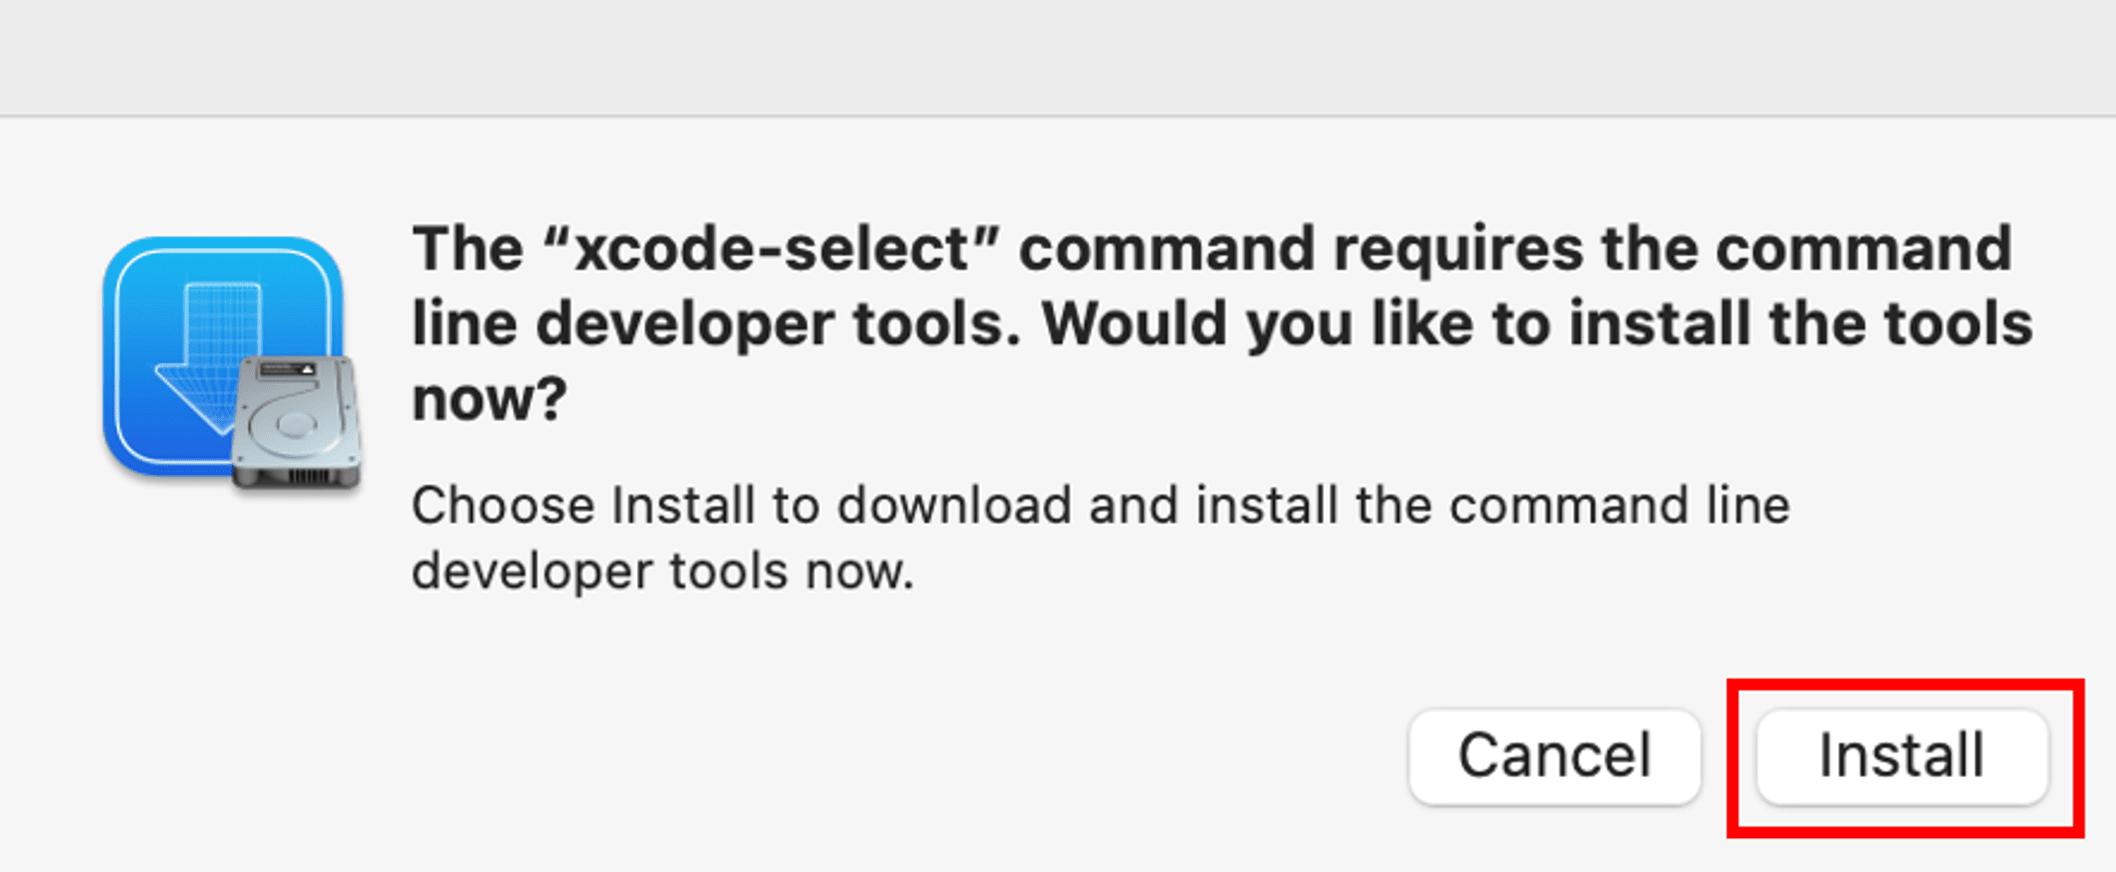
Terminalxcode-select --installXcode 명령줄 개발자 도구를 설치하라는 메시지가 표시되면 설치를 선택합니다. 마지막으로 라이선스 계약에 동의합니다.
![명령줄 개발자 도구를 설치하라는 Xcode의 프롬프트]()
모든 것이 정상이면 아래의 계속 버튼을 선택하여 다음 단계로 이동합니다.

